Upside Down Pear Ginger Cake

So by nature I’m a bit of a rule follower. I’m positive it’s why I love to bake. Baking is all about rules. It is about butter to flour to sugar to egg ratios. It’s about balancing fats and liquids, and beating for the right amount of time to ensure a tender crumb, delicate flavours, and fluffy texture.

IMG_1140.CR2

I guess what I’m saying is, I don’t often mess with recipes. I know I can execute well, so why mess with a recipe I already know will turn out?

IMG_1142.CR2

But sometimes, strawberries are out of season, and I don’t feel like investing 10$ in a jar of cardamom when my spice cabinet is already overflowing. Seriously, if anyone has clever spice organization tips, I’m all ears. I can’t find ANYTHING in there.

See, here’s what happened: Friday night I was invited to dinner at the home of one of my oldest family friends. Having run into them at a birthday party the week before where I had made one of my favourite cakes – Orange-Ginger Carrot Cake with White Chocolate Almond frosting (it went un-pictured, I’m sorry, but the original post on it is way better than what I could come up with, and being a rule follower I made no changes to the recipe), they knew I could bake. When their daughter confirmed she was in for dinner, I knew I was making dessert.

My original plan for an elaborate layer cake fell through when my Friday suddenly filled up with errands and obligations, so I turned to one of my favourite, no fail and very speedy recipes: Joy the Baker’s famous upside-down strawberry cake with cardamom. It’s one of those fabulous recipes that takes 25 minutes to get into the oven and turns out perfectly Every. Single. Time.

Except I couldn’t find strawberries at the nearby grocery store, and I had a good parking spot. Good parking spots are worth more than gold in my neighbourhood, so there was no way I was moving my car to go buy some strawberries. Especially when I didn’t feel like spending money on cardamom.

But they did have pears, and I do have several containers of dried ginger (the reason being that I always think I’m out. Messy spice cabinet = I have no idea what I own). So I tweaked a little.

IMG_1148.CR2

And because the recipe always comes out perfectly, it worked.

IMG_1149.CR2

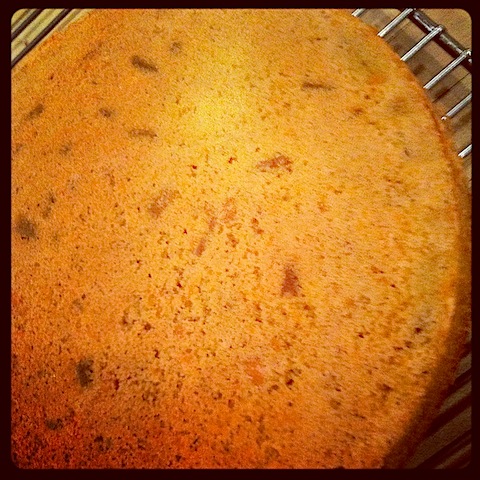
The cake was fluffy, tender, and impossibly moist. The butter and brown sugar caramelized with the pears to create that delicious oozing caramel you see pictured above. I even impressed myself with my ability to properly guess that a 3/4 teaspoon of ginger and a teaspoon of cinnamon would give the cake that perfect spiced flavour. I could’ve really turned it into a spice cake by adding some molasses, but then I would have been messing with the baking holy-grail: the wet:dry ratio, and I feel like I’m just not ready for that yet.

Upside Down Pear Ginger Cake (adapted from Joy the Baker)

Ingredients:

For the toping:

2 tablespoons butter

1/4 cup brown sugar

2 pears, sliced thinly

For the cake:

1/2 cup (1 stick) unsalted butter, softened and cut into chunks

2/3 cups brown sugar

1 large egg

1 teaspoon vanilla extract

1 1/3 cups all purpose flour

1 teaspoon baking powder

1/4 teaspoon baking soda

1/4 teaspoon salt

3/4 teaspoon ground ginger

1 teaspoon cinnamon

2/3 cups sour cream

Instructions:

1. Preheat oven to 350 degrees.

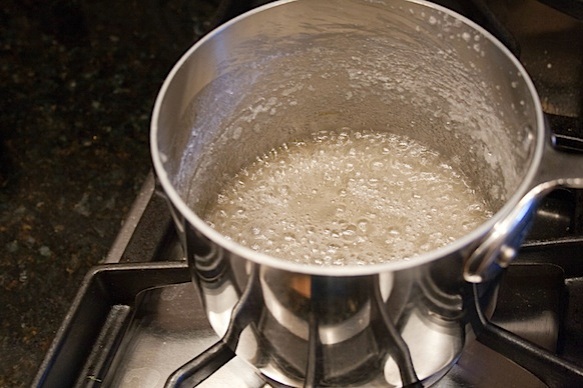
2. In a 9-inch cake pan place butter, and then put the pan into the oven. When putter is melted remove pan, swirl butter up the sides of the pan to coat it, then set aside.

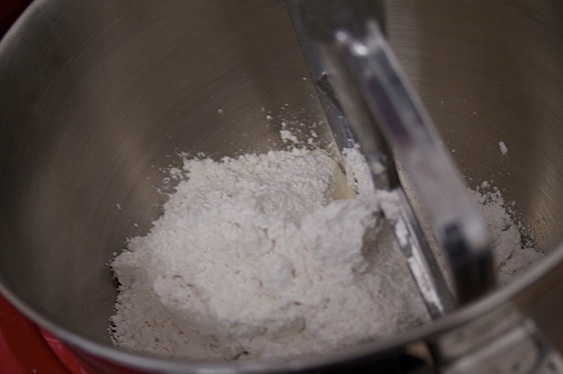
3. In a medium sized bowl whisk together the flour, baking powder, baking soda, salt, ginger, and cinnamon. Set aside.

4. In the bowl of a stand mixer fitted with a paddle attachment cream butter and sugar until light and fluffy, about 3 minutes on medium speed. Scrape down the bowl and add the egg and vanilla, beat until combined, about one minute.

5. Scrape down the bowl and add the dry ingredients, mixing on low while adding the sour cream until just combined. Give it one or two final turns, gently with a rubber spatula. Over-mixing will ruin this cake, so just go until the batter is uniform. It will be quite thick, that’s ok.

6. Sprinkle the brown sugar over the melted butter in the cake pan, and then lay out the pear slices.

7. Pour the batter over the fruit, spreading to the edges with a spatula. Bake for 35 minutes, or until a toothpick inserted into the centre comes away clean or with just a few crumbs. Another good test is to lightly push the middle of the cake down, if it springs back, you’re good to go.

8. Let the cake cool for about ten minutes before running a knife along the edges to loosen it up, and then turn it out onto a cake platter. It should loosen quite easily, but if it doesn’t tap the bottom of the cake pan a few times until it comes free.

1 Comment

Filed under Uncategorized

Gooey Butter Cake Bars

So I don’t often bake in my own kitchen. I adore my apartment, and the kitchen is perfect for every-day cooking, but when it comes to baking three-layer cakes, it just doesn’t have the counter space.

IMG_1136.CR2

Or a dishwasher for that matter (but note the love of my life my Kitchenaid 600 series in red, 6 quart bowl, 590 horsepower… Perfect).

I do most of my baking at the home of a close-friend who has graciously offered me the use of her two (yes TWO!!) ovens, and giant kitchen island whenever I need it. In exchange I leave her house smelling like cake, and occasionally bake for her family as well (ok, it isn’t so occasional, it’s like a weekly thing…)

But last week I went to a friend’s for dinner, and casually offered to bake dessert, without planning ahead, or thinking about the actual amount of time I had that afternoon. Turns out, it wasn’t enough time for me to drive to and from my friend’s, workout, shower, change, and drive over to the east bay where my friend’s dinner was. Especially in rush hour traffic.

I know, I know. First-world-problems.

So I scoured the internet for easy, quick, delicious bar recipes, and stumbled across a recipe that’s been on my to-bake list for over a year.

IMG_1137.CR2

Gooey butter-cake bars. I believe this recipe has southern origins in St. Louis, Missouri. I’m also fairly certain Paula Dean originally made it famous. It’s called butter cake after all. This particular version comes from the Momofuku Milk Bar book, which tweaks the original a bit to make the centre a touch gooey-er. It’s a good thing. Trust me.

It’s a recipe that I wouldn’t normally make. The base is boxed yellow cake, and I don’t typically believe in using boxed mixes. Half the joy of baking for me comes from carefully measuring ingredients and knowing that I made it from scratch. But I was afraid to mess with what everyone else seemed to say was perfection. Furthermore I was running out of time, and fast. So I ran to the store and bought a box of yellow cake mix, a bag of powdered sugar, and a block of cream cheese. I didn’t need to buy butter because my fridge currently looks like this:

IMG_1141.CR2

Send help, in the form of butter-heavy recipes please. Except I’m not sure I need that much help finding recipes that overuse butter. Please note the name of this blog.

IMG_1122.CR2

To the cake mix I added a single egg and a melted stick of butter, then I pressed it into the bottom of a parchment lined 8 by 8 baking dish.

IMG_1129.CR2

The powered sugar was beaten with the block of cream cheese, two more eggs, and a teaspoon of vanilla until smooth, then poured on top of the base.

IMG_1134.CR2

The whole thing was in the oven within 15 minutes, and baked for 52. The recipe said 40-45, but my oven is a gas oven and while I do have an oven thermometer I think it tends to run a bit cold. Regardless, 52 minutes was perfect. The centre was a touch jiggly but it set beautifully so that when I cut into it later that evening it held together yet remained perfectly gooey. The edges were golden brown and slightly crispy on top. We spent some time debating which was better: the centre pieces or the edge pieces. The results were unconclusive. I’ll probably have to make it again so we can come to some kind of agreement…

The top was slightly flakey, the bottom just soft enough to differentiate from the filling. I may be a convert to boxed cake mix in certain situations.

I would’ve taken a picture of the inside… But I forgot to pull out my camera. It was one of those great nights with lots of friends, some wine, some beer, laughter, and great food. So you’ll have to trust me: these were outstanding.

Gooey Butter Cake Bars

Makes about 64 1-inch squares, feeds much fewer than 64 people, good luck stopping at one square.

Ingredients:

1 Box yellow cake mix

3 Eggs

1 stick (1/2 cup, 4 ounces) of unsalted butter, melted

1 block (8 ounces) of cream cheese, softened

1lb (one bag) of powdered sugar

1 tsp vanilla

Instructions:

1. Preheat oven to 350 degrees, and line an 8 by 8 pan with parchment paper, leaving an overhang. This will make the bars a snap to remove and cut.

2. In a medium bowl melt the butter in the microwave. Then mix, using a wooden spoon with cake mix, and one egg until mixture is uniform. Press into bottom of prepared pan.

3. In a stand mixer fitted with a paddle attachment beat together powdered sugar, remaining two eggs, cream cheese and vanilla until smooth and uniform. Pour over the base and spread to the edge using a rubber spatula.

4. Bake for 40-45 minutes or until the edges are golden brown and the centre is lightly brown and still slightly jiggly – similar to a cheesecake. Let cool COMPLETELY before slicing into 1inch squares using a sharp knife.

Leave a comment

Filed under Uncategorized

Pistachio Cake with Honey-Vanilla Frosting

I disappeared for a while. I know. But I have the best excuse ever. No really. I spent the month of January in Paris and Dusseldorf, working for my old company and running around Europe with a good friend.

Fortunately there was a lot of eating. We enjoyed croissants, house-made bratwurst, German style red-cabbage, fondue… the list goes on. Of course, me being me, most of it went un-pictured. I adore food, but I’m not exactly great about documenting my adventures in pictures. I generally leave that to everyone else.

What I am good at however, is baking. So when, a few weeks after my return, my friends and I decided to throw a surprise birthday party for my closest and oldest friend’s 25th birthday party, I knew I was making cake.

photo 5.JPG

And after a month in Europe, eating pistachio macaroons like it was my job (which it unfortunately was not) I made pistachio cake with a cooked honey-vanilla buttercream. It was my first time attempting this kind of frosting, but I’m pleased to say it came out perfectly. Not to sweet, soft, fluffy, and lacking that grit that tends to come from the traditional, powdered-sugar structured butter-creams. My favourite remains my beloved swiss-meringue buttercream, but this certainly takes less time and the frosting is less finicky.

The cake recipe comes from one of my favourite cookbooks, BAKED Explorations, which I have talked about before. I love their maple cupcake recipe, and I loved this recipe. I made a slight adjustment to the original, subbing an extra stick of butter in for the 1/2 cup of shortening it asked for. I have nothing against shortening per-say, but I believe natural ingredients are best, and butter is natural.

photo 2.JPG  

This cake whipped up easily. I baked the layers on Friday evening, froze them overnight, and assembled the cake Saturday morning before heading up to Sacramento for the aforementioned surprise party.

photo-3.jpg

Please tell me I’m not the only one who’s idea of a perfect Saturday morning is crumb-coating at 8:00am.

And if it isn’t, then make this cake, it may just change your mind about Saturday morning activities.

Pistachio Cake with Honey Vanilla Buttercream (makes one three-layer 8-inch round cake)

Lightly adapted from BAKED: Explorations

For the Cake:

1 cup shelled pistachios

2 1/2 cups of cake flour

3/4 cups all-purpose flour

1 tablespoon baking powder

1 teaspoon baking soda

3/4 teaspoons of salt

1 cup (two sticks) unsalted butter, softened

1 3/4 cups of sugar

1 tablespoon pure vanilla extract (TJ’s makes a Mexican vanilla extract that is really good and really reasonably priced)

1 large egg

3 large egg whites

1/4 teaspoon cream of tartar

Process:

1. Preheat the oven to 325 degrees. Butter three 8-inch round cake pans, flour and tap out the excess. Then line with parchment circles cut to fit the bottom of the pans.

2. In a food processor, process the pistachios until coarsely chopped. Stop the food processor and remove roughly 2 tablespoons worth of pistachios, place in a medium sized bowl. Process the rest until they are almost powder-like. Add to the coarsely chopped pistachios. Sift both flours, baking powder, baking soda, and salt together into the same bowl as the pistachios. Stir with a wooden spoon to combine.

3. In the bowl of a stand mixer, fitted with a paddle attachment cream beat the butter until creamy. This should take 3-4 minutes. Add the sugar and vanilla and beat on medium speed until light and fluffy, roughly 3 minutes.

4. Scrape down the bowl, and add the whole egg, beating until just combined, turn the mixer to low.

5. Place a few ice-cubs in a measuring cup, then add cold water until just below the 1 1/2 cup mark. Wait a few minutes for the ice to melt and then measure water to 1 1/2 cups.

6. Add the flour mixture to the mixer in three additions, alternating with the ice-water in three additions. Begin and end with the flour. When adding turn the mixer to low to add the ingredients and then kick the speed up to medium for a few seconds to thoroughly incorporate. When done scrape down the bowl, and mix on low speed for a few more seconds.

7. In a medium bowl whisk the egg whites and cream of tartar until soft peaks form. Believe it or not, you can do this by hand. It takes about 3 minutes and is a GREAT workout for your biceps and forearms. Do not over-beat (when I say soft-peaks I do mean soft) and then gently fold the egg-whites into the batter.

8. Divide batter into the three prepared pans, and smooth the tops with an offset-spatula. Bake for 40-45 minutes or until a toothpick inserted into the centre of the cake comes out clean. Transfer to a wire rack and cool for 20 minutes before turning the cakes out onto the rack to cool completely.

For the Frosting:

1 1/2 cups of sugar

1/3 cup of all-purpose flour

1 1/2 cups of whole milk

1/3 cup heavy cream

1 1/2 cups (3 sticks) unsalted butter, cubed and room temperature

1 teaspoon pure vanilla extract

3 tablespoons of honey

Process:

1. In a medium-sized heavy-bottomed saucepan, whisk the sugar and flour together.

2. Add milk and cream to the saucepan and cook it over medium heat, whisking initially to combine and then every few minutes as it comes to a boil. After about 10-15 minutes it will have thickened to a glue-like consistency. Pull it off the heat and transfer into a mixing bowl fitted with a paddle attachment.

3. Beat on high speed until the outside of the bowl is cool to touch. This takes about 7-9 minutes.

4. Reduce the speed to low and add the butter gradually. Ensure it is fully mixed in and then bring the speed up to medium-high and mix until the frosting goes fluffy and light.

5. Add the vanilla and honey to the frosting and mix until uniform.

Assembly:

1. Lay the first layer onto a cake stand or serving platter and trim the top to level the cake. Place a heaping cup of frosting over the top and smooth it out. Repeat with the next layer before placing the final layer on top.

2. Coat the outside of the cake with a thin layer of frosting – the crumb coat, and then place in the fridge for 15-30 minutes to set.

3. Pull out of the fridge and then spread the sides and top of the cake with remaining frosting. Garnish with crushed pistachios.

– Note: the cake keeps great in an airtight container at room temperature for a few days. If you’re worried though it keeps well in the fridge as well.

3 Comments

Filed under Uncategorized

Pear Cake with Salted Caramel Swiss-Meringue Buttercream

I feel like this cake deserves an apology, the pictures I am about to show you of this cake are not particularly inspiring. You see, I baked it for a friend’s birthday party in early December and I was running around like a mad-woman trying desperately to finish it off before I had to be at her house. I was losing light, I was out of time, and, well, I just snapped a few pictures and hoped for the best.

IMG_1121.jpg

See, it doesn’t look like much. But it is. It really, truly, and absolutely is. So for the sake of this particular cake I’m asking you to just look past its outside appearance. It’s what’s on the inside that counts anyways right?

The cake is a perfectly moist, dense-yet-still-fluffy, marzipan-almond-pear cake that I covered in a salted caramel Swiss-meringue buttercream. Let’s talk for a moment about how to make Swiss-meringue buttercream even more unbelievably delicious than it already is – add homemade caramel sauce, and then toss in a teaspoon or so of sea-salt.

I can see your eyes widening. I know, I know. Homemade caramel is scary. You have to boil water and sugar and remove it from the heat at exactly the right time or risk either burnt caramel (I’ve done it, it doesn’t taste good) or a caramel that is too mild in flavour and as a result simply tastes like sugar. Both are undesirable, and both are risks you have to be willing to take because let me assure you: homemade caramel is worth it.

IMG_1117.jpg

You just have to be ok with watching it as it does its thing. Stand over your stove and watch it. When it starts to go amber, keep watching, count to 60 then pull it off the stove, and carefully, in small increments to avoid a bubbling overflow of boiling sugar, stir in your heavy cream. You want it rich amber. Sure you can also use a candy thermometer, but I actually never have. Maybe I have just been lucky, but I’m confident that you’ll be lucky as well.

But let me talk about the cake for a minute because they caused me a lot of stress. You see, this recipe comes from a cupcake recipe that my personal hero Sweetapolita made a few months ago. I spent days drooling over her marzipan-pear cupcakes with caramel buttercream which she topped with the most beautiful gold-gilded marzipan pear toppers. I thought about making the cupcakes, but when my friend asked me to make her birthday cake (in actuality I sent her an email in reply to her invitation in which I pretty much begged her to let me do it) I though it might turn into a wonderful cake.

And it did.

IMG_1115.jpg

Fair warning however: this cake is finicky. I suspect it would have been less stress-inducing if I had made cupcakes. The dough is quite soft thanks to the brilliant addition of a lot of marzipan, and a lot of pureed pear. It makes for a delicious cake, but I have never been more nervous turning out cakes than the moment I flipped these out of the pans. Both layers nearly ripped as I transferred them onto the cooling rack, and I was only able to take them off and stack them because i used two oversized spatulas to support them from underneath.

I’m generally a pretty calm person, but when I’m moving delicate cake-layers I become a stress-ball. Seriously, I hyperventilate a little.

But in the end it was good. Actually, it was really, really good. I mean when you pair marzipan, pears, and caramel with a hefty amount of butter and sugar, how on earth could it possibly be wrong?

IMG_1119.jpg

So make this cake. It may not look like much, but it’s flavour more than makes up for its appearance.

For the Cake – yields 1 eight inch 2 layer cake:

Very lightly adapted from Sweetapolita

1 cup + 2 teaspoons unsalted butter at room temperature cut into chunks

240 grams of marzipan

2/3 cups granulated sugar

1/2 teaspoon vanilla extract

6 large eggs, at room temperature

1 cup plus 2 tablespoons all purpose flour
1.5 teaspoons baking powder
1/2 teaspoon salt
4 tablespoons ground almonds
1/2 cup pureed pear (about 2 large pears)
1. Preheat the oven to 350 degrees. Generously butter two eight inch cake pans. Add in some flour and coat the sides of the pan tapping out the excess. Then cut two parchment circles to fit the bottom of the pans and line the bottoms. I know it seems like a lot of work but it will allow your cakes to actually release from the pan, which is key.
2. In a medium bowl sift your dry ingredients together, whisk and set aside.
3. In the bowl of a stand mixer fitted with a paddle attachment beat the butter, sugar, and marzipan until light and fluffy on medium speed – around three minutes. Add the vanilla and beat to combine.
4. Add eggs one at a time, scraping down the side of the bowl after each addition.
5. Add the dry ingredients, mix on low until incorporated and then beat on medium for about 3 minutes.
6. Using a spatula fold in the ground almonds and pear into the batter.
7. Divide between the two baking pans. If you want to get really obsessive you can weigh them to ensure they are even. It does ensure equally sized, evenly baked cake-layers!
8 Bake for 25-30 minutes, or until a toothpick inserted into the cake’s centre comes out clean. A warning that they will look rather soft and potentially a bit under-done, but so long as the toothpick is clean you will be fine.
9. Let cool in the pans for five minutes and then turn out onto a cooling rack.

For the Frosting:
1 cup Sugar
1/4 cup water
1 teaspoon salt (start with a pinch an add more to taste)
1/4 cup heavy cream
1.5 cups of unsalted butter at room temperature.
4 large eggs whites
1 teaspoon vanilla extract
1. Combine the water and 1/2 cup plus 2 tablespoons of the sugar in a small pot over medium heat, and stir consistently as it comes to a boil. Once boiling, leave it except to occasionally brush down the sides with a silicon pastry brush. Cook until the caramel is a dark amber, swirling the pot occasionally. Remove from the heat and slowly add cream, whisking as you go, and taking a break if it starts to look like it will bubble over. Add salt to taste, and then set aside.
2. Beat the butter in a stand-mixer fitted with a paddle attachment until pale- and fluffy. This takes about 4 minutes on a medium setting. Remove from the mixer bowl, and clean the bowl thoroughly. I like to rub it down with some vinegar as if there is any trace of grease the meringue will not whip up properly.
3. Transfer your egg whites and remaining sugar into the mixer bowl. Set the bowl over gently simmering water and whisk until the eggs come to 160 degrees F on a candy thermometer.
4. With the whisk attachment on, whip the egg whites and sugar until glossy and stiff peaks form, this takes about 3-5 minutes on high speed.
5. When the bottom of the bowl is no longer warm to touch, start adding in the butter one cup at a time whisking well after each addition. It may look like it has separated. If this happens, kick up the speed on your mixer and beat until it comes together – it will. I promise.
6. When all the butter has been added whisk in the cooled caramel.

To Assemble:
1. Carefully transfer one of the cake layers onto a turntable. Plop about 3/4 of a cup of frosting on-top and smooth around until fairly even.
2. Carefully place the second layer on top of the first one. Frost the entire thing in a thin layer. This is your crumb coat. Then place into the fridge for about 30 minutes.
3. Pull back out and cover in a thicker layer, using a bench scraper to even out the sides.
Devour. No seriously. DEVOUR.

1 Comment

Filed under Uncategorized

Chocolate Chip Cookie Dough Cupcakes

When I was a kid my mom and I used to bake cookies together, and I used to beg her for permission to steal cookie dough, lick the beaters, the bowl… etc. I’m pretty sure it’s a small miracle I didn’t get salmonella.

But let’s get one thing straight: raw cookie dough is, in my opinion, better than the finished product. I mean I love cookies. Especially fresh out of the oven warm, gooey, and delicious chocolate chip cookies, but there’s something about raw cookie dough that is just plain unbeatable.

Something else I love? Cupcakes. I mean they’re just so flipping cute, the options are endless, and they’re already perfectly portioned! What’s not to adore?

IMG_1114.jpg

So when I found this recipe for Chocolate Chip Cookie Dough cupcakes last year, it quickly became a favourite. And when I helped plan a friend’s surprise 30th birthday party last month I knew exactly what kind of cupcakes I was making.

These really taste like cookie dough. The cakes are vanilla and brown sugar, with a hefty dose of chocolate chips.

IMG_1106.jpg

The stuffing is a faux-cookie dough, made with sweetened condensed milk which gives it a cookie-dough like texture and a taste that is truly spot-on. So much so that more than once I’ve debated just making this filling so I could eat excessive amounts of ‘cookie-dough’ without worrying about getting sick.

IMG_1109.jpg

And the frosting on these. Oh. My. God. The frosting is out of this world. The recipe calls for brown sugar and flour in addition to the traditional components of an American buttercream – butter, powdered sugar, and vanilla. The result is a thick yet fluffy frosting that really, really tastes like cookie-dough down to the final details including that slight grittiness created by the flour. This is the kind of frosting where people fight over who gets to lick the bowl and beaters, trust me. For the record – I will fight you for them, and I will win.

IMG_1113.jpg

So if you want a show-stopping cupcake that people will talk about for weeks, make these. There are a lot of steps, but they are 100% worth it.

Chocolate Chip Cookie Dough Cupcakes (makes 24 cupcakes)

*A few notes – I’d recommend making the filling first, or even the day before as it needs to hang out in the fridge for a little while before you can do anything else. Also, I like to use an apple corer to take out the centres of my cupcakes, but a pairing knife will work. As to what you’re supposed to do with the cupcake centres? Eat them.

For the Filling:

4 tablespoons (1/2 stick) unsalted butter, at room temperature

6 tablespoons packed light brown sugar

1 cup plus 2 tablespoons all-purpose flour

7 oz. sweetened condensed milk

1/2 teaspoon vanilla extract

1/4 cup mini semisweet chocolate chips

1. In the bowl of a stand mixer beat the butter and sugar together until light and fluffy.

2. Add flour, the sweetened condensed milk and the vanilla. Beat until combined.

3. Fold in the chocolate chips, transfer into a separate bowl and cover tightly with plastic wrap. Let set in the fridge for at least an hour.

For the Cupcakes:

3 sticks unsalted butter, and cut into several chunks, at room temperature

1 1/2 cups packed light brown sugar

4 large eggs, at room temperature

2 2/3 cups all-purpose flour

1 teaspoon baking powder

1 teaspoon baking soda

1/4 teaspoon salt

1 cup milk (I use whole milk as you always should when baking. Seriously, just do it)

2 teaspoons vanilla extract

1 cup semisweet chocolate chips

1. Pre-heat the oven to 350 degrees and line two cupcake tins with cupcake liners.

2. Measure the flour into a medium-sized bowl and remove two tablespoons. Place the removed flour in a bowl with the chocolate chips and toss to coat – this will keep your chocolate chips from sinking to the bottom of the cupcakes. To the bowl containing only flour add the baking powder, baking soda, an salt.

3. In the bowl of a stand mixer fitted with a paddle attachment cream the butter and brown sugar together until light and fluffy. Scrape down the sides of the bowl.

4. Add the eggs one at a time, beating after each addition. Scrape down the sides of the bowl once more.

5. Turn the mixer down to low and alternate adding the dry ingredients and the milk, beginning and ending with the dry ingredients. You should do three additions of the dry ingredients and two of the milk. Beat until incorporated, and add the vanilla.

6. Fold in the chocolate chips and then portion evenly into baking cups, filling about 3/4 full (I like to measure out a scant 1/4 cup per liner, it ensures fairly even cupcakes).

7. Bake for 18-20 minutes, or until a toothpick inserted into the centre comes out clean. After about five minutes transfer to a wire rack to cool completely.

For the Frosting:

3 sticks unsalted butter, at room temperature

3/4 cup packed light brown sugar

3 1/2 cups powdered sugar, sifted. Please take the time to sift your powdered sugar it makes the difference between lumpy frosting and delicious smooth frosting.

1 cup all-purpose flour

3/4 teaspoon salt

3 tablespoons milk

2 1/2 teaspoons vanilla extract

1. Beat butter and brown sugar in the bowl of a stand mixer fitted with a paddle attachment until creamy.

2. Add powdered sugar and beat until incorporated.

3. Add flour and salt and beat until combined. Then beat in milk and vanilla. If you want to thin or thick out the frosting a bit either at more milk or more powdered sugar accordingly, but mine was good with the prescribed amounts.

To Assemble:

Remove the centres of each cupcake. As mentioned above, I like to do this with an apple corer, but a pairing knife works as well. Stuff with a heaping tablespoon of the filling. I generally just roll small balls of it with my hands and press it into the centre of the cupcake. Frost using whatever decorative tip you prefer. I used a plain round one, but anything will work as the frosting is quite thick and should hold a shape nicely.

6 Comments

Filed under Uncategorized

Roasted Butternut Squash and Sweet Potato Lasagna

I don’t own a TV. This is relevant I promise.

IMG_1082.jpg

My parents are modern-day-hippies (still relevant). You know, the kind that inhabit most of San Francisco… Hippies who shower as a friend once described them, and they didn’t really believe in watching television. As a result I still, to this day, don’t really spend that much time sitting in front of the TV flipping channels. I mean I watch a lot of stuff on Netflix, and I do have a Glee addiction (I was a musical theatre kid in high school, it speaks to me), but when I moved a few weeks ago and went on a furniture buying frenzy, a TV was not on my list of things to purchase.

So as a result of being raised more or less under a rock, I miss a lot of references, and I’ve been forced to come up with time-wasters other than television. My personal favourite? Scouring the internet for recipes.

IMG_1063.jpg

The result? I have a bookmarks folder, that’s getting a bit out of control, filled with recipes to make. Seriously, it’s a bit ridiculous.

This one in particular has been sitting in there for about a month since I saw it on How Sweet It Is. I just needed an excuse. You see, most nights, dinner involves throwing a ton of vegetables together covering it in TJ’s Goddess dressing (which you should go out and buy immediately if you don’t already own it) and calling it a day. Sometimes I get ambitious and cook up some tofu with vegetables, and rice and call it stir-fry.

When I get really lazy I microwave a tortilla with cheese and call it a quesadilla. I can’t believe I just admitted that on the internet. Please don’t judge me.

So when my friend invited me over for dinner I offered to bring lasagna and leftover cake because what kind of a person would I be if I didn’t bring cake?

IMG_1072.jpg

And this lasagna recipe? Well it is kind of amazing. I mean it has mascarpone, garlic, and shallots…

IMG_1068.jpg

Roasted sweet potato and butternut squash covered in olive-oil and salt, pepper, and a light dusting of nutmeg.

IMG_1075.jpg

And browned butter. Have you ever browned butter? Not only does it make your entire home (well my 500 square foot apartment at any rate) smell like a caramel factory, it adds an indescribable depth of flavour to anything you make.

IMG_1076.jpg

Did I mention the shallots and garlic get caramelized in the butter as it browns?

IMG_1073.jpg

Yeah…

IMG_1077.jpg

Did I mention that in addition to the creamy mascarpone filling, and the smooth mashed roasted vegetables, you also get to add 1.5 cups of parmesan cheese and 2 cups of mozzarella to this thing?

Before you ask, yes, the final results were worth every penny I spent on expensive cheese. In my defence, my family is French. Overspending on food, and cheese in particular pretty much comes with the territory.

IMG_1090.jpg

So I forgot to get pictures of the final thing, since I finished baking it at my friend’s place so we’d have that perfectly gooey slightly crispy top-layer that, let’s face it, is the reason why people eat lasagna. Plus, isn’t exactly photogenic once it has been put together, which I suspect is the reason it is a dish that doesn’t show up on food blogs all that often. Which is a sad thing because this lasagna in particular is one of the best non-baked good things I have ever made.

So do yourself a favour and make this for dinner. Tonight, tomorrow, next week, I don’t care. Just do it.

4 Comments

Filed under Uncategorized

Sweet Potato Cake

This is the best cake I have ever made.

IMG_0404.JPG

Seriously.

I know I say it every post, but seriously, this cake is a bit of a miracle. I mean there’s a lot going on.

The cake is sweet-potato, with a generous amount of cinnamon and ground ginger, and finely chopped crystallized ginger.

IMG_0318.JPG

IMG_0345.JPG

The filling is toasted marshmallow. Yes. Toasted marshmallow. I don’t think I need to elaborate any further.

The frosting? Brown-sugar-cinnamon Swiss Meringue Buttercream. The amazing thing is that swapping brown sugar in for the white sugar usually used in SMB makes a massive difference in the flavour. It adds a certain sense of warmth, and the addition of cinnamon just takes it to the next level.

IMG_0342.JPG

To finish it all off, there are the candied pecans. Sprinkled over the top of the cake, they add a crunch and nuttiness that just finishes the whole thing off.

IMG_0379.JPG

As I said, there’s a lot going on in this cake and the miracle is that all the different elements don’t just work together, they literally sing.

IMG_0396.JPG

Yes, I went there. I referred to food as singing. But it’s appropriate. Think of the flavours as different harmonies, and when they come together it’s pretty amazing.

Ok, I took it too far. I’ll stop with the bad analogies.

Now.

So I served four desserts at Thanksgiving, and this is the one that was finished off first. This cake earned me more compliments than anything else I made. The cake itself is light, moist, sweet, lightly-spiced, and unique. The toasted marshmallow filling is reminiscent of campfires, and the mildness compliments the cake’s complexity. And the frosting… Well it’s Swiss Meringue Buttercream. Lightly, floaty, not too sweet, with a depth and complexity that comes from the use of brown-sugar and the addition of cinnamon which ties it to the rest of the cake. The pecans just take the entire thing over the top, from outstanding to life changing.

As I said, this was the best cake I’ve ever made.

This cake takes a while. I baked it on Tuesday and froze it wrapped tightly in two layers of plastic wrap. I made the frosting on Wednesday, and made the filling and completed the assembly on Thursday (Thanksgiving day) morning.

IMG_0394.JPG

And yes, you have to split the cake layers. Yes, it’s terrifying, but as you can tell from the picture above I didn’t do a perfect job and I still pulled off an awesome cake. So don’t stress it too much. Frosting can cover up all kinds of mistakes.

But it was worth it. Absolutely, 100% worth it.

Once again, I made no changes to Sweetapolita’s outstanding recipe, so the next time you need a show-stopping cake to make, make this one.

There will be miraculous music, I promise.

I lied when I said I was done with bad analogies. I’m sorry. Ok, that’s a lie too.

Just make the cake, it’s a really, really good idea.

1 Comment

Filed under Uncategorized

Pumpkin Cheesecake

Most people, me included, feel pretty passionate about cheesecake.

IMG_0389.JPG

I mean it’s the kind of dessert that is delicious when made right, profoundly disappointing when make incorrectly, and unfortunately easy to make wrong

I mean we’ve all heard the horror stories of the overly-dense lumpy cheesecake that stuck to the roof of your mouth for hours afterwards right?

And then there is the dreaded ‘crack.’ You know what I’m talking about – when you pull your cheesecake out of the oven only to discover that the top has fractured and created an ugly and noticeable scar on the top of your painstakingly crafted dessert.

But when it’s done right, when the top doesn’t crack, and the cream-cheese is properly softened and whipped into oblivion to ensure absolutely no lumps get through?

IMG_0376.JPG

That’s when the magic really happens.

This pumpkin cheesecake was a part of my thanksgiving ‘quartet’ and while I couldn’t possibly chose a favourite out of the four I made, I can tell you that this is by far the best cheesecake ever.  

Yes it requires you to bake it in a water-bath. And yes, it’s worth it. You know why? Using a water-bath = no cracking (caveat: if you over-bake the cake it will crack no matter what so do pull it out when the centre is still jiggly. It will set as it cools. I promise.).

IMG_0367.JPG

But back to the cake: it was light, creamy, delicious, delicately spiced, and elegant. The whipped cream topping served to tie together the crumbly ginger-pecan shortbread crust, and the slightly tangy-sweet filling. An egg-heavy batter that included a 1/2 cup of whipped cream kept the whole thing rich, creamy, smooth, and surprisingly light.

I do mean light in texture. Not in calories. Forget any misguided notion you ever had that cheesecake is a health food.

IMG_0363.JPG

So if you’re afraid of cheesecake making, make this one. I promise as long as you follow the directions, and use the dreaded water-bath, it WILL turn out delicious.

And yes, it takes a little bit of time, but it is well worth the effort. A quick note that when I made this I put the cake together on one day, let it sit in the fridge overnight and added the topping the next day, then kept it in the fridge until about an hour before serving it.

Pumpkin Cheesecake (lightly adapted from Sprinkle Bakes)

Ginger-Pecan Crust:
1 cup all purpose flour
1/4 cup firmly packed light brown sugar
1/8 tsp salt
1/3 cup pecans (1.2 oz.)
1/4 tsp ground ginger
1/2 cup cold butter
1 tablespoon cold water

1. Preheat your oven to 350 degrees and generously butter a 9-inch springform pan. Properly buttering the edges will ensure you get a proper pan release, so don’t skimp. Wrap the pan in heavy duty aluminum foil, do this or you’ll have water seep into the pan and ruin your crust.
2. Throw flour, brown sugar, salt, pecans, and ginger into a food processor and process until pecans form crumbs.
3. Add in cold butter and process until crumbs form.
4. Add the water and process in short bursts until the dough starts to come together.
5. Press into the bottom of the spring-form and bake for 25-30 minutes. Remove from oven and allow to cool completely.

Pumpkin Filling:
1 cup canned pumpkin puree
1/2 cup heavy cream
2 teaspoons vanilla extract
1 tsp ground cinnamon
1/2 tsp ground ginger
1/4 tsp salt
1 1/4 lbs (20 oz, or 2 1/2 eight oz. bricks) cream cheese, softened
1/2 cup granulated sugar
1/2 cup brown sugar, packed
1 tbsp cornstarch
4 large eggs

1. Turn down heat on the oven to 325 degrees.

2. In a small bowl whisk together the pumpkin puree, heavy cream, vanilla, cinnamon, ginger ,and salt.

3. In the bowl of an electric mixer fitted with a paddle attachment beat the cream cheese at medium speed until it is creamy (depending on how warm your cream cheese is this will take 2-4 minutes, the goal is to beat out any and all of those pesky lumps).

4. Add the sugars gradually and beat until combined.

5. Add the pumpkin mixture and beat until batter is uniform.

6. Add eggs one at a time, mixing after each addition until incorporated into the rest of the batter.

7. Using a rubber spatula pour the cheesecake filling into the cooled spring-form over the crust. Place the pan into a large baking dish filled with water so it comes about 1-inch up the sides of the springform. Bake for 70-80 minutes or until the sides are set and the centre of the cake still jiggles. Cool completely, it will set as it cools.

Whipped Cream Topping:

2 cups heavy cream

1/2 cup of sugar

1. Whip the cream in the bowl of a standing mixer until it thickens.

2. Add the sugar in gradually, beating the sugar and cream until stiff-peaks form.

3. Spread over the top of the cake and pipe the extra whipped cream into decorative swirls.

Keep cake in the fridge until ready to serve.

3 Comments

Filed under Uncategorized

Gingerbread Pear Cranberry Crisp (and Thanksgiving)

Last week was the biggest week of my year. You see, for the last six years I have lived in Vancouver, BC, where Thanksgiving takes place in early October and is not quite as big a deal as it is in the USA. I mean it’s still fun but it’s a three day weekend not a four day weekend, and because it is in early October it doesn’t quite signal the start of the holiday season the way US Thanksgiving does.

This year, I felt like I had a marathon-long list of things to be thankful for, but first and foremost, I was/am beyond thankful for the opportunity to once again live in my favourite city in the world, surrounded by the majority of my favourite people.

So to show my gratitude and appreciation, I did what I do best: I baked.

IMG_0416.JPG

I mean, I’m pretty sure I don’t know how to say thank you other than via baked goods.

For the record, the back four desserts were by me. I promise to tell you more about them this week.

Today I want to tell you about the dessert that was the most un-assuming. Second from the left – Gingerbread Pear-Cranberry Crisp.

I saw this recipe on Smitten Kitchen about a month ago, and immediately bookmarked it, thinking ‘I’ve got to make that for Thanksgiving.’ My family has a history of crisps on Thanksgiving, and since I had offered to be in charge of the desserts (really I announced I was doing them and I think everyone was too afraid of my butter and sugar crazed self to argue) I figured I had to include crisp as a hat-tip to tradition since I don’t really make pie…

I love pears, and I love cranberries, so I suspected the mix of tart and sweet flavours combined with the spiciness of the gingersnaps would be outstanding.

IMG_0413.JPG

Well friends, I was right.

IMG_0409.JPG  

Not only was it delightful to look at, with the bright red cranberries giving this dessert a particularly festive flair. It was delicious. I was nervous that the topping, which is basically crushed cookies, some flour, spices, and butter, would be too crumbly, or powdery, but it clumped perfectly and retained its crispness until this particular dessert was finished off for breakfast on Friday morning.

The acidity from the cranberries and the lemon juice paired flawlessly with the mildness from the pears and gingerbread flavour just tied it all together.

IMG_0411.JPG

So if you’re looking for an easy and delicious dessert to grace your holiday table (I suspect this would certainly be Christmas appropriate) then I suggest you do yourself a favour and make this crisp.

Pear, Cranberry and Gingersnap Crisp
Very Lightly Adapted from Smitten Kitchen

Crumble
1 cup all-purpose flour
1/4 cup granulated sugar
3 tablespoons brown sugar
16 store-bought gingersnap cookies (I used the triple-ginger snaps from Trader Joes and it worked perfectly)
1/8 teaspoon ground ginger
1/8 teaspoon table salt
1/2 cup/1stick unsalted butter, melted and cooled, plus some extra to butter the pan

Filling
2 pounds (about 4 to 5) large ripe pears peeled, halved, cored and sliced 1/4 inch thick
1 1/2 cups fresh cranberries
1 tablespoon lemon juice – about 1/2 a lemon
1/2 teaspoon finely grated lemon zest (about 1 lemon worth of zest)
1/2 teaspoon vanilla extract
1/2 cup plus 2 tablespoons granulated sugar
2 tablespoons (14 grams) cornstarch

1. Preheat your oven to 350 degrees, and lightly butter a 2 quart oven-proof baking dish

2. Combine flour, both the sugars, gingersnap crumbs, ginger, and salt. Pour in the melted butter and stir until mixture clumps.

3. To the baking dish add the pear, cranberries, lemon juice, lemon zest, and vanilla. Stir to coat in lemon juice. In a separate small bowl whisk sugar and cornstartch, then add to fruit, mixing to ensure all fruit is coated.

4. Cover in the crisp topping. It will feel like a lot, but just use it all. Trust me on this one. Bake for 45 minutes until the topping is just a bit brown, and you can see juices bubbling through the topping and around the edges.

3 Comments

Filed under Uncategorized

Vanilla Bean White Cake with Whipped Vanilla Frosting

I would apologize for the fact that all the photos for this post come off my iphone camera, but this cake needs to be talked about. Badly. And when I turned on my DSLR this morning as I pulled the eggs and butter out of the fridge, it flashed that terrible ‘low battery’ warning and then died. So I turned to my phone because waiting to bake until the battery charged just wasn’t going to happen.

But enough about cameras, let’s discuss cake.

IMG_0285.JPG

This cake is a fluffy, light, yet somehow still moist (yes, I hate the word too) vanilla bean white cake with the smoothest, most delicious whipped vanilla frosting that tastes like ice-cream.

White cakes are interesting. Often they are dry, crumbly, and dense. The batters are temperamental. A high liquid content leaves them prone to curdling and we’ve all accidentally dropped the yolks into the egg whites as we separated them right? Right?? No, just me? Well now you know my secret. I make mistakes too.

But let me assure you that this cake is worth careful egg-separating, and ensuring you don’t add your liquids to the batter too quickly.

This is one of those cakes where you promise yourself you’ll only have a sliver and then the next thing you know, half of it has disappeared. Does that happen to anyone else? Please say yes.

This is one of those cakes people talk about for months. I first served this cake during a dinner party a friend threw in September. Three months later I’m still being reminded that I need to make this very cake for all upcoming birthdays and events. This cake will make you a lot of friends, and isn’t that why everyone bakes? Do me a favour and just agree.

This cake isn’t fancy, and it’s not the most show-stopping of cakes but the flavour and texture are perfect.

The recipe comes from my absolute favourite cake blog – Sweetapolita, and since I made absolutely no changes to her already flawless recipe I’ll let you head over to her blog for the exact details on how to make this cake.

Instead, I want to talk about cake decorating.

IMG_0283.JPG

Look, I understand. Really I do. Layer cakes are intimidating. You have to prepare pans with parchment paper, somehow flip out still warm cakes without ripping them in half. Then wait patiently while they cool. Level, mask, frost, pray to the cake gods that you have enough frosting to fill all your layers and cover your entire cake….

IMG_0267.JPG

But I’m here to tell you it’s easy. Seriously, if I can do it, you can too. All it takes is a bit of patience, some precision, and the right tools. I like to use a rubber spatula, an offset pallet knife, and a straight pallet knife. A bench scraper is helpful in getting those elusive perfect edges.

It all begins with good pan preparation. I know this seems tedious and a bit excessive, but trust me when I say it makes a world of difference. After you preheat the oven, and before you do anything else you absolutely must, must MUST do the following: generously butter your pans, drop in a tablespoon or so of flour and coat the sides of your pan with flour before tapping out the excess. Now for the fun part. Place the pan on a piece of parchment paper and trace it. Cut out the circle, then place it in the bottom of the pan. This guarantees a perfect release. Every. Single. Time. No more ripped cakes, no more banging, tapping, or prying. Just loosen the edges when they come out of the oven, and then flip them onto a cooling rack.

While your cakes cool, make your frosting.

IMG_0271.JPG

Let me take a moment to say, that I love frosting.

IMG_0273.JPG

I’m pretty certain I make cake, simply so I can eat frosting. This frosting in particular will change your life. I frequently state that foods will change your life. I know that. But you should know that while I say it often, I don’t say it lightly.

Once your cakes have cooled, grab a turntable (You can find a cheap, ugly, but ultimately functional one at Michael’s for around $20. No it wont last forever, but if you’re like me and cheap, it’ll work), and place a smear of frosting on the turntable. Then plop your cake layer down on top. The frosting keeps it in place, and keeps your cake from sliding off the turntable.

IMG_0277.JPG

Then cover the top with a generous layer of frosting, before laying on the second layer. Repeat with any additional layers, though I only used two in this instance.

IMG_0281.JPG

Using a rubber spatula, press frosting onto the sides. Then hold the straight pallet knife against the side of the cake and slowly spin the turntable to spread across the sides of the cake. Get a thin layer on there, and then throw the cake into the fridge for about half an hour.

When the frosting has set, pull it out and throw on a thicker layer. This is where I like to hold a bench scraper lightly against the side as I turn the cake to get really smooth edges.

IMG_0291.JPG

Decorate as you see fit. Tonight, since this is for a friend’s birthday, I chose sprinkles. You can’t go wrong with sprinkles right?

2011-11-16_18-19-02_521.jpg

Just agree with me. It’ll be easier that way.

4 Comments

Filed under Uncategorized